# 项目环境搭建
前两小节通过对 Electron 和 Webpack 的介绍的简单介绍,我们对其有了一定的了解,接下来这一小节主要是搭建基本的开发环境。通过一步步的动手实践,并将 TypeScript、ESLint、Prettier 等引入,最后搭起我们的 React 项目。
# 第一阶段:Electron 搭建
官方对于应用搭建有详细的文档说明,下面基于官方文档,讲解一下 Electron 的搭建
# 1. 安装 Node 环境
在搭建 Electron 应用前,请先确保 Node.js 已经安装,接下来在终端输入命令
node -v | |
npm -v |
这两个命令应输出了 Node.js 和 npm 的版本信息。 如果这两个命令都执行成功,那就接着往下走
# 2. 安装 Electron
我们创建一个新文件夹,名为 onlineResume ,进入文件夹并安装 Electron
mkdir onlineResume | |
cd onlineResume | |
npm install electron@11.1.1 |
# 3. 基本框架结构
前面说了,Electron 是基于 Chromium + Node.js 开发的,也就是说 Electron 本质上就是一个 Node.js 应用。这意味着 Electron 应用程序的起点将是一个 package.json 文件。
我们创建一个 package.json 文件,并且创建主进程脚本 electron.ts ,该脚本就是应用程序的入口。为了区分主进程模块和渲染进程模块,我以文件夹形式进行区分。
├── onlineResume | |
│ ├── app | |
│ │ ├── main // 主进程模块 | |
│ │ │ ├── electron.js | |
│ │ │ └── index.html | |
│ │ ├── renderer // 渲染进程模块 | |
│ │ └── | |
│ ├── package.json | |
│ └── | |
└── |
# 4. 编写 package.json
编写一下我们的 package.json 配置。我们将应用程序的入口文件配置为主进程脚本
{ | |
"name": "onlineResume", | |
"version": "0.0.1", | |
"description": "简历制作", | |
"main": "./app/main/electron.js", | |
"scripts": { | |
"start:main": "electron ./app/main/electron.js", | |
"install:electron": "ELECTRON_MIRROR=https://cdn.npm.taobao.org/dist/electron/ npm install electron" | |
}, | |
"dependencies": { | |
"electron": "^11.1.1" | |
} | |
} |
# 5. 定义 html
我们编写创建一个 HTML,等会加载此页面
<!DOCTYPE html> | |
<html lang="en"> | |
<head> | |
<meta charset="UTF-8" /> | |
<meta name="viewport" content="width=device-width, initial-scale=1.0" /> | |
<title>onlineResume</title> | |
</head> | |
<body> | |
<div id="root">简历平台应用搭建起来啦!</div> | |
</body> | |
</html> |
# 6. 编写主进程
在主进程脚本中,通过 BrowserWindow 创建浏览器窗口(也就是一个渲染进程),你可以将其看成浏览器的一个 Tab。请注意 BrowserWindow 还有一个配置参数叫做 webPreferences,我们需要将其选项中的 nodeIntegration 设置为 true,这样我们才能在渲染进程中就能使用 node。
/** | |
* @desc electron 主入口 | |
*/ | |
const path = require('path'); | |
const { app, BrowserWindow } = require('electron'); | |
function createWindow() { | |
// 创建浏览器窗口 | |
const mainWindow = new BrowserWindow({ | |
width: 1200, | |
height: 800, | |
webPreferences: { | |
nodeIntegration: true, // 注入 node 模块 | |
}, | |
}); | |
mainWindow.loadFile('index.html'); | |
} | |
app.whenReady().then(() => { | |
createWindow(); | |
app.on('activate', function () { | |
if (BrowserWindow.getAllWindows().length === 0) createWindow(); | |
}); | |
}); |
# 7. 启动应用程序
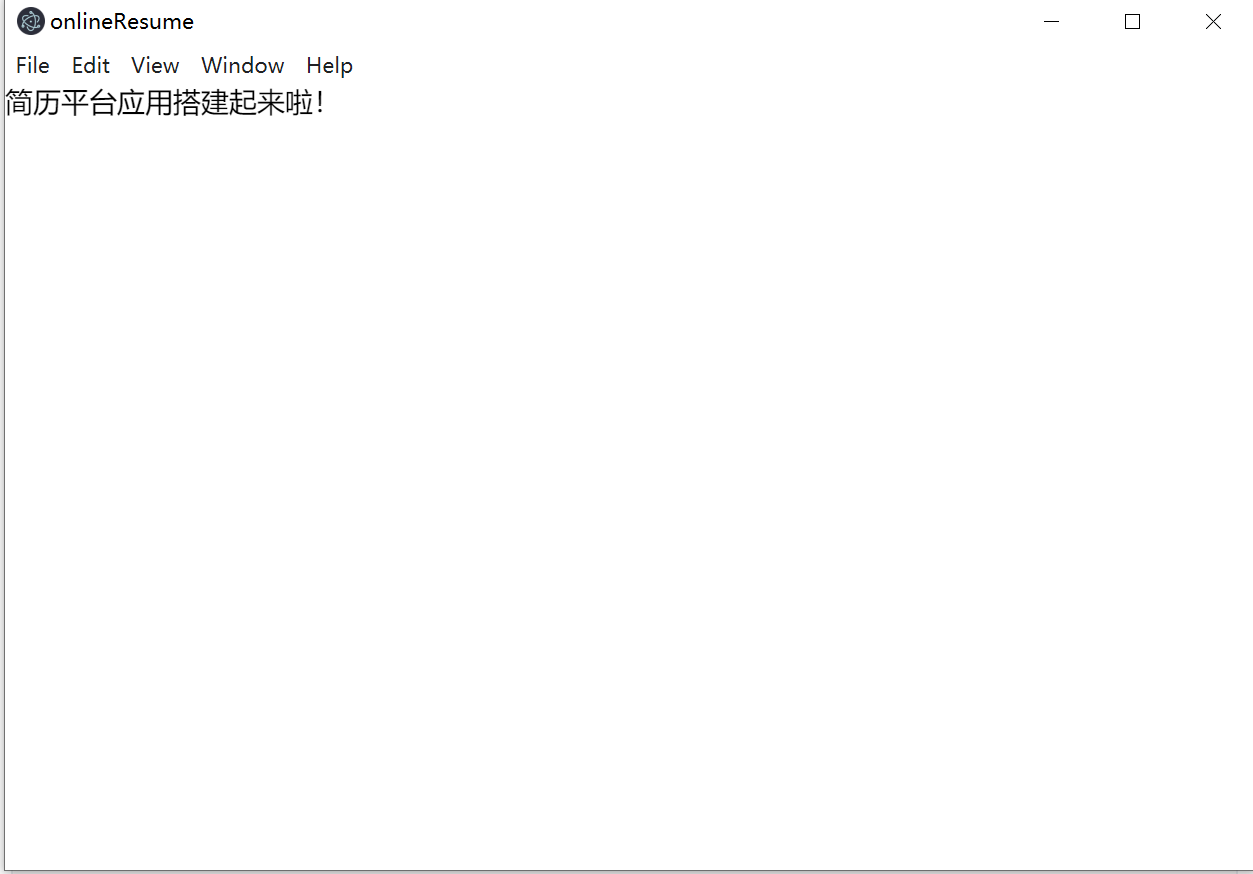
最后我们执行 npm run start:main ,就能看到我们搭建的简历应用啦~

# 第二阶段:React 搭建
# 1. 安装 React
我们打开终端,此时先安装 React ,并且安装它相应的兄弟姐妹
npm install react@17.0.2 | |
npm install react-router@5.2.0 react-router-dom@5.2.0 react-dom@17.0.2 |
# 2. 安装 Babel
接着安装一下 Babel ,它是 JS 编译器,能将 ES6 代码转成 ES5,让我们使用最近的语言特性,而不需要担心兼容性的问题。关于 install 的库,接下来会讲其作用
npm install @babel/polyfill@7.12.1 --save | |
npm install @babel/core@7.14.3 @babel/cli@7.14.3 --save-dev | |
npm install @babel/preset-env@7.14.2 @babel/preset-react@7.13.13 @babel/preset-typescript@7.13.0 --save-dev | |
npm install @babel/plugin-transform-runtime@7.14.3 --save-dev | |
npm install @babel/plugin-transform-modules-commonjs@7.14.0 --save-dev |
安装完成之后,根据 Babel 官网的教程,我们创建 babel.config.js ,配置一下我们常用的插件 plugins 和 预设值 presets
module.exports = { | |
presets: [ | |
'@babel/preset-env', // 👉 根据配置的目标浏览器或者运行环境,选择对应的语法包,从而将代码进行转换 | |
'@babel/preset-react', // 👉 react 语法包,让我们可以使用 React ES6 Class Component 的写法,支持 JSX、TSX 语法格式 | |
'@babel/preset-typescript', // 👉 https://github.com/babel/babel/issues/10570 | |
], | |
plugins: [ | |
'@babel/plugin-transform-runtime', // 👉 官方提供的插件,作用是减少冗余的代码 | |
[ | |
'@babel/plugin-transform-modules-commonjs', // 👉 将 ECMAScript modules 转成 CommonJS. | |
{ | |
allowTopLevelThis: true, | |
loose: true, | |
lazy: true, | |
}, | |
], | |
], | |
}; |
# 3. 安装 Webpack
我们安装一下 Webpack ,新版本可能会有一些区别。为了省事可以指定版本。
npm install webpack@4.44.1 --save-dev | |
npm install webpack-cli@3.3.12 --save-dev |
我们期望监听文件的变化,能够自动刷新网页,做到实时预览,而不是改动一个字母,一个文字都需要重新打包。业界较为成熟的解决方案是通过: webpack-dev-server 插件,OK,我们安装它。
npm install webpack-dev-server@3.11.2 --save-dev |
对于主进程和渲染进程来讲,webpack 的配置是会存在差异的。比如渲染进程可能需要 less-loader、htmlWebpackPlugins 等 “专属” 配置,而这些配置对于主进程来讲,是无用的。
存在差异的同时又会有相同点,比如 alias 别名配置等,当我们不采用 webpack-merge 时,会导致每份配置会存在重复的 “配置” 代码。其次在 dev 和 prod 环境下,配置会存在一些小差别,这时我们代码中会充斥着一些三元运算符来判断环境。最后的结果为每一份配置的可读性相对较差。
为此我们通过 webpack-merge 插件进行处理
npm install webpack-merge --save-dev |
我们不想每次打包都需要手动修改 HTML 中的文件引用,并且期望采用自己写的 HTML 文件为模版,生成打包之后的入口 HTML,为此我们采用 html-webpack-plugin 插件进行处理。
npm install html-webpack-plugin@4.3.0 --save-dev |
因为每次打包的文件会不同,我们需要先删除之前的 dist 文件,再重新打包,为此我们可以通过 clean-webpack-plugin 进行解决
npm install clean-webpack-plugin --save-dev
由于 Babel 用于编译,Webpack 用于打包输出,两者各司其职,我们通过 babel-loader 打通他们的联系。
npm install babel-loader --save-dev |
在上面都安装好相关库之后,接下来到动手环节,首先我们创建一个 webpack 文件夹,专门存放 webpack 相关配置,这里主要分为三个文件:
webpack.base.js:基础公共配置webpack.main.dev.js:主进程开发环境配置webpack.render.dev.js:渲染进程开发环境配置
# 3.1 webpack.base.js
我们先来创建 webpack.base.js 基础公共配置文件
const path = require('path'); | |
const { CleanWebpackPlugin } = require('clean-webpack-plugin'); | |
module.exports = { | |
resolve: { | |
extensions: ['.js', '.jsx', '.ts', '.tsx'], | |
alias: { | |
'@src': path.join(__dirname, '../', 'app/renderer'), | |
}, | |
}, | |
module: { | |
rules: [ | |
{ | |
test: /\.(js|jsx|ts|tsx)$/, | |
exclude: /node_modules/, | |
use: { | |
loader: 'babel-loader', | |
}, | |
}, | |
], | |
}, | |
plugins: [new CleanWebpackPlugin()], | |
}; |
解读一下这段代码,Webpack 在启动后会从配置的入口模块出发,找到所有依赖的模块, resolve 配置 Webpack 如何寻找模块所对应的文件。我们配置了 extensions,表示在导入语句中没带文件后缀时,Webpack 会自动带上后缀去尝试访问文件是否存在。
我们配置中,配置了 extensions: ['.js', '.jsx', '.ts', '.tsx'] ,意味着当遇到 import A from './A' 时,会先寻找 A.js、找不到就去找 A.jsx ,按照规则找,最后还是找不到,就会报错。
alias 代表别名,因为我们经常写 import A from '../../../../../A' 这种导入路径,特别恶心,所以通过配置别名处理。关于 Loader,我们前边小节已介绍,它就是模块打包方案,上述代码即表示:当匹配到 /\.(js|jsx|ts|tsx)$/ 文件时,使用 babel-loader 去处理一下。
# 3.2 webpack.main.dev.js
我们看看主进程的配置,新增 webpack.main.dev.js 文件
const path = require('path'); | |
const baseConfig = require('./webpack.base.js'); | |
const webpackMerge = require('webpack-merge'); | |
const mainConfig = { | |
entry: path.resolve(__dirname, '../app/main/electron.js'), | |
target: 'electron-main', | |
output: { | |
filename: 'electron.js', | |
path: path.resolve(__dirname, '../dist'), | |
}, | |
devtool: 'inline-source-map', | |
mode: 'development', | |
}; | |
module.exports = webpackMerge.merge(baseConfig, mainConfig); |
解读一下这段代码,我们定义入口文件为 /app/main/electron.js ,并且定义打包出来的文件目录为 dist,文件名为 electron.js。
需要注意的一点是:由于 JS 的应用场景日益增长,从浏览器到 Node,运行在不同环境下的 JS 代码存在一些差异。target 配置项可以让 Webpack 构建出不同运行环境的代码
关于 target 的可选项,可从官网查阅,这里我们将其配置成 electron-main ,至于主进程的 plugins,我们定义了一些构建变量。最后通过 webpack-merge 合并导出一份完整的配置。
# 3.3 webpack.render.dev.js
在说配置之前,我们先来创建一个渲染进程对应的代码文件夹。我们在 app 文件夹下新增一个名为 renderer 文件夹。
回顾一下之前 Electron 部分是不是有一个 index.html 文件,我们我们将其移动到 renderer 文件夹下,并修改它
<!DOCTYPE html> | |
<html lang="en"> | |
<head> | |
<meta charset="UTF-8" /> | |
<meta name="viewport" content="width=device-width, initial-scale=1.0" /> | |
<title>VisResumeMook</title> | |
<style> | |
* { | |
margin: 0; | |
} | |
</style> | |
</head> | |
<body> | |
<div id="root"></div> | |
</body> | |
</html> |
接着我们在 renderer 下创建一个 React 的 app.jsx 文件
import React from 'react'; | |
import ReactDOM from 'react-dom'; | |
import { HashRouter as Router, Route, Switch } from 'react-router-dom'; | |
function App() { | |
return ( | |
<Router> | |
<Switch> | |
<Route path="/"> | |
<div>可视化简历平台</div> | |
<div>这是 Electron + React </div> | |
</Route> | |
</Switch> | |
</Router> | |
); | |
} | |
ReactDOM.render(<App />, document.getElementById('root')); |
我们再来修改一下渲染进程的相关配置,新增 webpack.render.dev.js 文件
const path = require('path'); | |
const webpackMerge = require('webpack-merge'); | |
const baseConfig = require('./webpack.base.js'); | |
const HtmlWebpackPlugin = require('html-webpack-plugin'); | |
const devConfig = { | |
mode: 'development', | |
entry: { | |
// 👇 对应渲染进程的 app.jsx 入口文件 | |
index: path.resolve(__dirname, '../app/renderer/app.jsx'), | |
}, | |
output: { | |
filename: '[name].[hash].js', | |
path: path.resolve(__dirname, '../dist'), | |
}, | |
target: 'electron-renderer', | |
devtool: 'inline-source-map', | |
devServer: { | |
contentBase: path.join(__dirname, '../dist'), | |
compress: true, | |
host: '127.0.0.1', //webpack-dev-server 启动时要指定 ip,不能直接通过 localhost 启动,不指定会报错 | |
port: 7001, // 启动端口为 7001 的服务 | |
hot: true, | |
}, | |
plugins: [ | |
new HtmlWebpackPlugin({ | |
// 👇 以此文件为模版,自动生成 HTML | |
template: path.resolve(__dirname, '../app/renderer/index.html'), | |
filename: path.resolve(__dirname, '../dist/index.html'), | |
chunks: ['index'], | |
}), | |
], | |
}; | |
module.exports = webpackMerge.merge(baseConfig, devConfig); |
解读一下这段代码,以 /app/renderer/app.jsx 为入口,并配置了本地开发 devServer,通过 HtmlWebpackPlugin 自动生成一份以 /app/renderer/index.html 为模版的 HTML 文件。注意此时的 target 是针对 Electron 渲染进程。最后通过 webpack-merge 合并导出一份完整配置。
# 5. Electron 与 React 结合起来
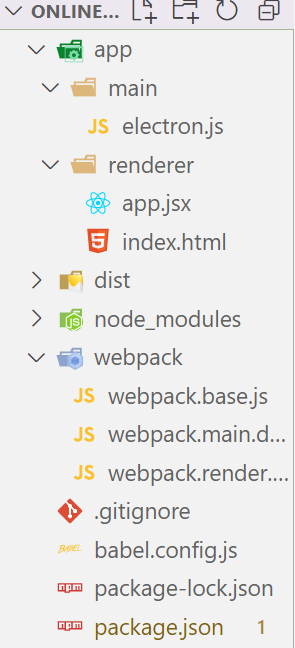
对于 Webpack 相关配置已经搭建完毕,我们来看看现在我们的文件目录都有哪些?

接下来我们让 Electron 和 React 结合起来,前面讲到,Electron 可以理解为页面添加了一个壳,由于我们将主进程中的 index.html 移到了渲染进程,所以我们需要修改一下 electron.js
/** | |
* @desc electron 主入口 | |
*/ | |
import path from 'path'; | |
import { app, BrowserWindow } from 'electron'; | |
function isDev() { | |
// 👉 还记得我们配置中通过 webpack.DefinePlugin 定义的构建变量吗 | |
return process.env.NODE_ENV === 'development'; | |
} | |
function createWindow() { | |
// 创建浏览器窗口 | |
const mainWindow = new BrowserWindow({ | |
width: 1200, | |
height: 800, | |
webPreferences: { | |
devTools: true, | |
nodeIntegration: true, | |
}, | |
}); | |
if (isDev()) { | |
// 👇 看到了吗,在开发环境下,我们加载的是运行在 7001 端口的 React | |
mainWindow.loadURL(`http://127.0.0.1:7001`); | |
} else { | |
mainWindow.loadURL(`file://${path.join(__dirname, '../dist/index.html')}`); | |
} | |
} | |
app.whenReady().then(() => { | |
createWindow(); | |
app.on('activate', function () { | |
if (BrowserWindow.getAllWindows().length === 0) createWindow(); | |
}); | |
}); |
🎉 接着进入 package.json 文件中,修改一下启动脚本命令,添加渲染进程的启动方式
"scripts": { | |
"start:main": "webpack --config ./webpack/webpack.main.dev.js && electron ./dist/electron.js", | |
"start:render": "webpack-dev-server --config ./webpack/webpack.render.dev.js" | |
}, |
# 6. 跑起来
我们开两个终端,一个跑 npm run start:render ,另一个跑 npm run start:main ,看看结果
# 第三阶段:引入更多技术点
接下来引入 TypeScript、ESLint、Prettier,让整个项目看起来更加丰富。
# 1. 安装 TypeScript
关于 TS 的入门学习,我建议小伙伴们去看官方文档,结合项目去上手写 TS,项目中的 TS 不会有很多复杂难以理解的地方,写着写着,你会发现其实 TS 没那么难,如果你想提升 TS,也可以看看 type-challenges 这个库
先安装 TypeScript
npm install typescript --save-dev
装完之后,我们将项目中的 js、jsx 文件都改造成 ts、tsx
由于我们将 renderer/app.jsx 作为入口文件,所以修改后,前往 webpack.render.dev.js 文件修改 entry ,避免项目启动报异常
entry: { | |
// 👇 这里改成.tsx | |
index: path.resolve(__dirname, '../app/renderer/app.tsx'), | |
} |
同时对于主进程 main/electron.js 也需要去 webpack.main.dev.js 修改一下 entry
entry: { | |
// 👇 这里改成.ts | |
entry: path.resolve(__dirname, '../app/main/electron.ts'), | |
} |
接下来我们在 renderer 文件夹下新增一个文件夹取名为 title,在此文件夹下新增 index.tsx 文件,让我们来写一下该组件,并定义组件的 Props
interface IProps { | |
/** | |
* @description 标题 | |
*/ | |
text: string; | |
/** | |
* @description 样式 | |
*/ | |
styles?: React.CSSProperties; | |
} |
我们会发现,TS 提示错误,原来我们还没安装 React 对应的 TS 包,安装一下
npm install @types/react --save-dev | |
npm install @types/react-dom --save-dev | |
npm install @types/react-redux --save-dev | |
npm install @types/react-router-dom --save-dev |
装好之后,我们继续写组件
import React from 'react'; | |
interface IProps { | |
/** | |
* @description 标题 | |
*/ | |
text: string; | |
/** | |
* @description 样式 | |
*/ | |
styles?: React.CSSProperties; | |
} | |
function Title({ | |
text,styles | |
}: IProps) { | |
return ( | |
<div style={styles}>{text}</div> | |
) | |
} | |
export default Title; |
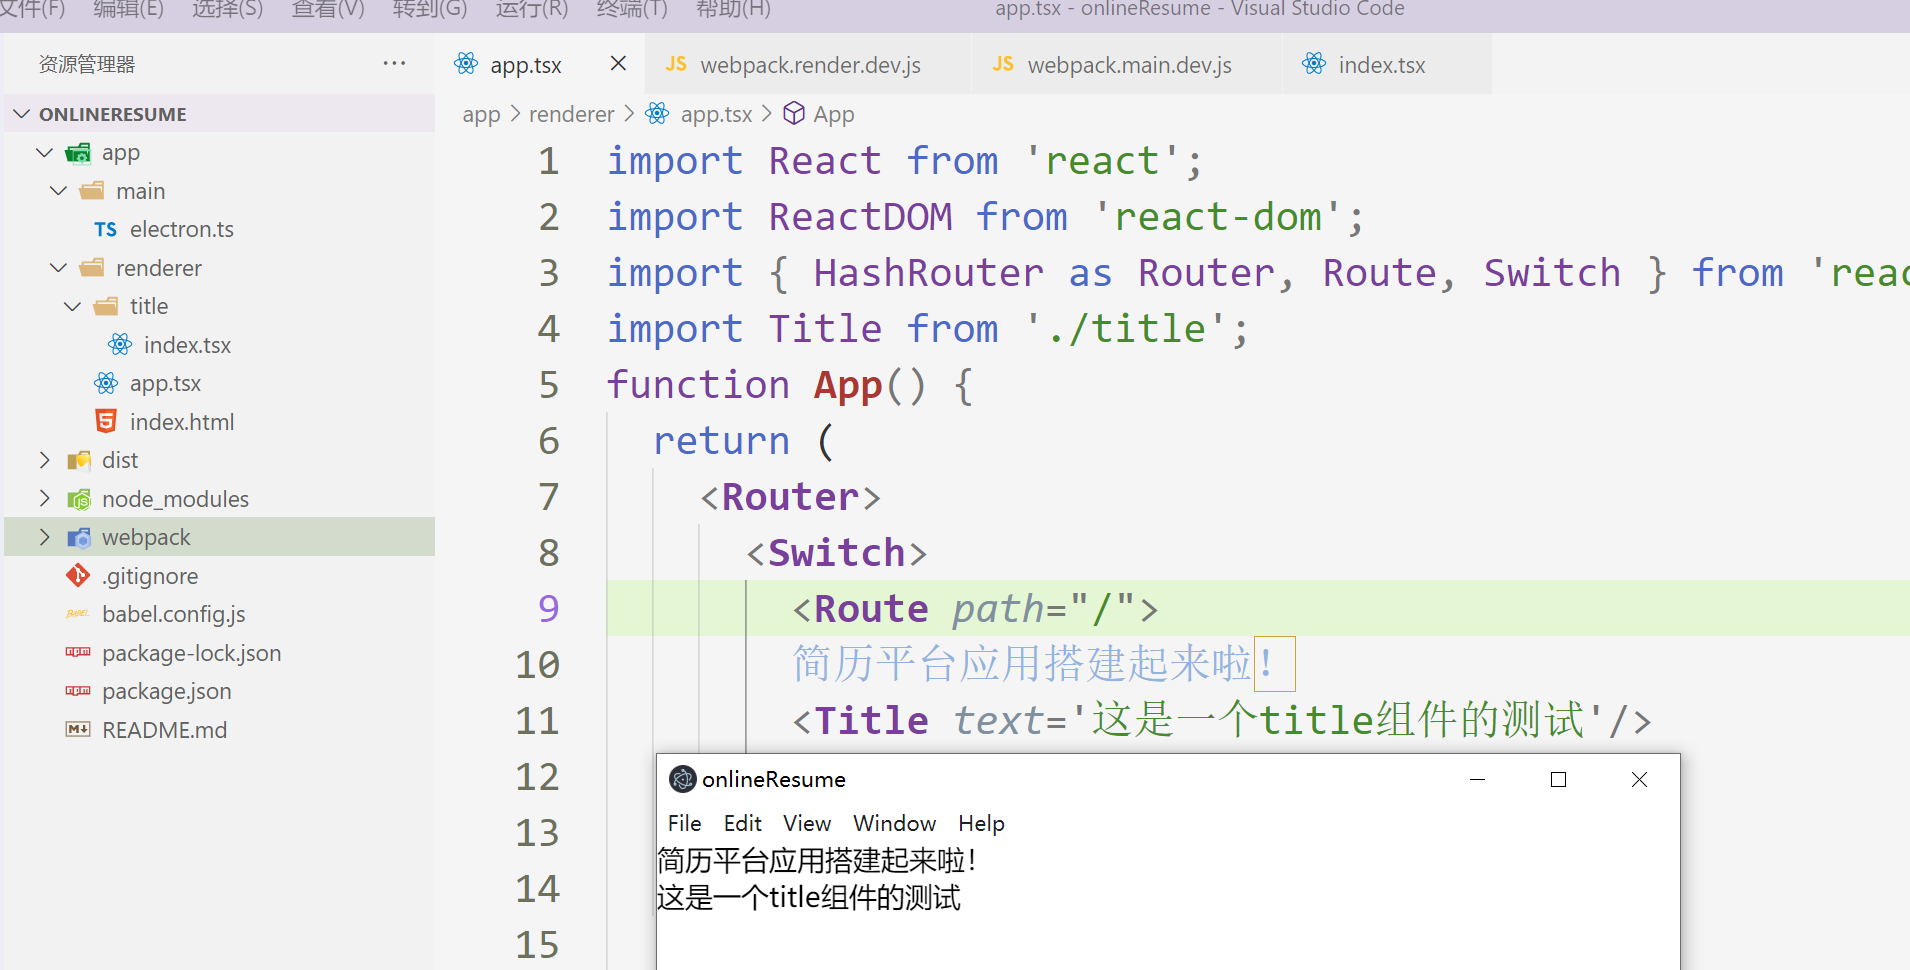
我们在 app.tsx 下引入此组件,看看是不是会有提示

一切如我们的预期,这表示我们可以很愉快的使用 TS 开发了。
# 2. 安装 ESLint + Prettier
我们看上面的 <Title /> 组件,看着有点膈应,好像不该换行的它换行了,该换行的没换行。我们总不能手动的去按回车、删空格吧?
这时我们使用 Prettier 进行代码格式化,相比于 ESLint 中的代码格式规则,它更加专业。同时我们采用 ESLint 来统一代码风格,提高我们的代码质量。
ESLint 将我们的代码解析成 AST,通过检测 AST 来判断代码是否符合我们设置的规则,往往不同公司团队会自定义一套自己的 ESLint 规范。
我们先来安装一下 Prettier 和 ESLint
npm install eslint@^7.26.0 --save-dev | |
npm install prettier@^2.3.0 --save-dev |
接着安装一些对应的插件信息,具体信息大家可去查询这些库都做了什么工作
npm install eslint-config-alloy@^4.1.0 --save-dev | |
npm install eslint-config-prettier@^8.3.0 --save-dev | |
npm install eslint-plugin-prettier@^3.4.0 --save-dev | |
npm install eslint-plugin-react@^7.23.2 --save-dev | |
npm install eslint-plugin-react-hooks@^4.2.0 --save-dev |
可能有人会问,有 ESLint,是不是也有 TSLint,答案是:有。但我并不推荐。
由于现在 ESLint 的生态比较完善,而 TSLint 首先是不能使用 ESLint 社区的一些成果,其次 TSLint 在生态上也相对较差,所以 TSLint 的作者已经宣布会逐渐放弃 TSLint ,而去支持 typescript-eslint-parser ,同时 Typescript 团队也宣布会将自己开发的 lint 工具从 tslint 迁移到 typescript-eslint-parser
npm install @typescript-eslint/parser@^4.24.0 --save-dev | |
npm install @typescript-eslint/eslint-plugin@^4.24.0 --save-dev |
安装好之后,我们在项目根目录下创建 tsconfig.json 、 .prettierrc 、 .eslintrc.js
// tsconfig.json | |
{ | |
"compilerOptions": { | |
"target": "ES2016" /* 编译结果使用的版本标准: 'ES3' (default), 'ES5', 'ES2015', 'ES2016', 'ES2017', 'ES2018', 'ES2019', 'ES2020', or 'ESNEXT'. */, | |
"module": "commonjs" /* 编译结果使用的模块化标准: 'none', 'commonjs', 'amd', 'system', 'umd', 'es2015', 'es2020', or 'ESNext'. */, | |
"lib": [ | |
"ESNext", | |
"DOM" | |
] /* 在写 ts 的时候支持的环境,默认是浏览器环境。如需要支持 node,安装 @type/node */, | |
"jsx": "react" /* Specify JSX code generation: 'preserve', 'react-native', or 'react'. */, | |
"sourceMap": true, | |
"strict": true, | |
"declaration": true, | |
"removeComments": true /* 编译结果把 ts 的注释移除掉 */, | |
"esModuleInterop": true /* es6 的模块化和非 es6 的模块化标准互通 */, | |
"allowSyntheticDefaultImports": true, | |
"baseUrl": "./", | |
"paths": { | |
"@src/*": ["./app/renderer/*"] //webpack 配置别名,但在 TS 中会报红找不到,所以 tslint 也需要配置 | |
}, | |
"moduleResolution": "node" | |
}, | |
"exclude": ["dist", "node_modules"], // 这里需要排除掉 dist 目录和 node_modules 目录,不进行检查 | |
"include": ["app/**/*.ts", "app/**/*.tsx", "app/**/*.d.ts"] | |
} |
// .prettierrc
{
  "eslintIntegration": true,
  "printWidth": 120,
  "tabWidth": 2,
  "useTabs": false,
  "singleQuote": true,
  "endOfLine": "auto"
}
// .eslintrc.js | |
module.exports = { | |
extends: [ | |
'alloy', | |
'alloy/react', | |
'alloy/typescript', | |
'plugin:react-hooks/recommended', | |
'plugin:prettier/recommended', | |
], | |
globals: { | |
// 这里填入你的项目需要的全局变量 | |
// 这里值为 false 表示这个全局变量不允许被重新赋值,比如: | |
__dirname: false, | |
}, | |
rules: { | |
'no-undefined': 'warn', | |
'no-debugger': 'off', | |
complexity: ['error', { max: 99 }], | |
// 这里填入你的项目需要的个性化配置,比如: | |
// @fixable 一个缩进必须用两个空格替代 | |
indent: [ | |
1, | |
2, | |
{ | |
SwitchCase: 1, | |
flatTernaryExpressions: true, | |
}, | |
], | |
// @fixable jsx 的 children 缩进必须为两个空格 | |
'react/jsx-indent': [1, 2], | |
// @fixable jsx 的 props 缩进必须为两个空格 | |
'react/jsx-indent-props': [1, 2], | |
'react/no-string-refs': 1, // 不要使用 ref | |
'no-template-curly-in-string': 1, // 在 string 里面不要出现模板符号 | |
'@typescript-eslint/prefer-optional-chain': 'off', | |
'@typescript-eslint/explicit-member-accessibility': 'off', | |
'@typescript-eslint/no-duplicate-imports': 'off', | |
'react/no-unsafe': 'off', | |
'@typescript-eslint/no-invalid-this': 'off', | |
'react/jsx-key': 0, | |
'no-undef': 0, | |
}, | |
}; |
这时候我们再去看前边写的代码,会发现一堆报红,我们只需 Ctrl+S 保存一下即可。
⚠️ 提示:如果发现未生效,可以重新打开一下 vscode
# 3. CSS Modules 问题
大家都知道,CSS 的规则都是全局的,任何一个组件的样式规则,都对整个页面有效。为了解决此情况,CSS Modules 的解决方案就是:使用一个独一无二的 class 的名字,不会与其他选择器重名。所以我们一般会看到,很多类命都是 hash 值 + 组件名 ,下面说说如何在 Webpack 中配置 CSS Module
在此项目中,我们采用 less 进行样式相关的编写,安装它
npm install less@3.12.2 --save-dev |
我们进入 Webpack 官网 Loader 配置,看看它提供处理样式类型的打包方案,关于这些 Loader 的具体介绍可在官网查阅
npm install less-loader@6.2.0 --save-dev | |
npm install postcss-loader@3.0.0 --save-dev | |
npm install css-loader@3.0.0 --save-dev | |
// 👇 将我们的样式通过 style 标签插入到页面 head 中 | |
npm install style-loader@2.0.0 --save-dev |
前面我们说了,Loader 就是模块打包方案,我们去 webpack.render.dev.js 中添加配置
// webpack.render.dev.js | |
const devConfig = { | |
// 👇 追加这段代码 | |
module: { | |
rules: [ | |
{ | |
test: /\.css$/, | |
use: ['style-loader', 'css-loader', 'postcss-loader'], | |
}, | |
{ | |
test: /\.less$/, | |
exclude: /node_modules/, | |
use: [ | |
'style-loader', | |
{ | |
loader: 'css-loader', | |
options: { | |
modules: { | |
localIdentName: '[name]__[local]__[hash:base64:5]', | |
}, | |
}, | |
}, | |
'postcss-loader', | |
'less-loader', | |
], | |
}, | |
], | |
} | |
}; |
这时候我们在 <Title /> 组件下编写一个 index.less 文件,看其样式否如我们所愿?
import React from 'react'; | |
import lessStyle from './index.less'; | |
function Title() { | |
return ( | |
<div className={lessStyle.title}> | |
这是一个title组件的测试 | |
</div> | |
) | |
} | |
export default Title; |
.title { | |
color: red; | |
} |
运行,看看是否可行?发现还是不行,我们看看报什么错?

解决此问题需要我们在项目根目录下创建 postcss.config.js ,添加一下配置
module.exports = { | |
plugins: { | |
autoprefixer: { | |
overrideBrowserslist: ['> 0.5%', 'last 5 versions'], | |
}, | |
}, | |
}; |
同时因为引入了一个 plugins,所以需要安装一下
npm install autoprefixer@9.0.0 --save-dev |
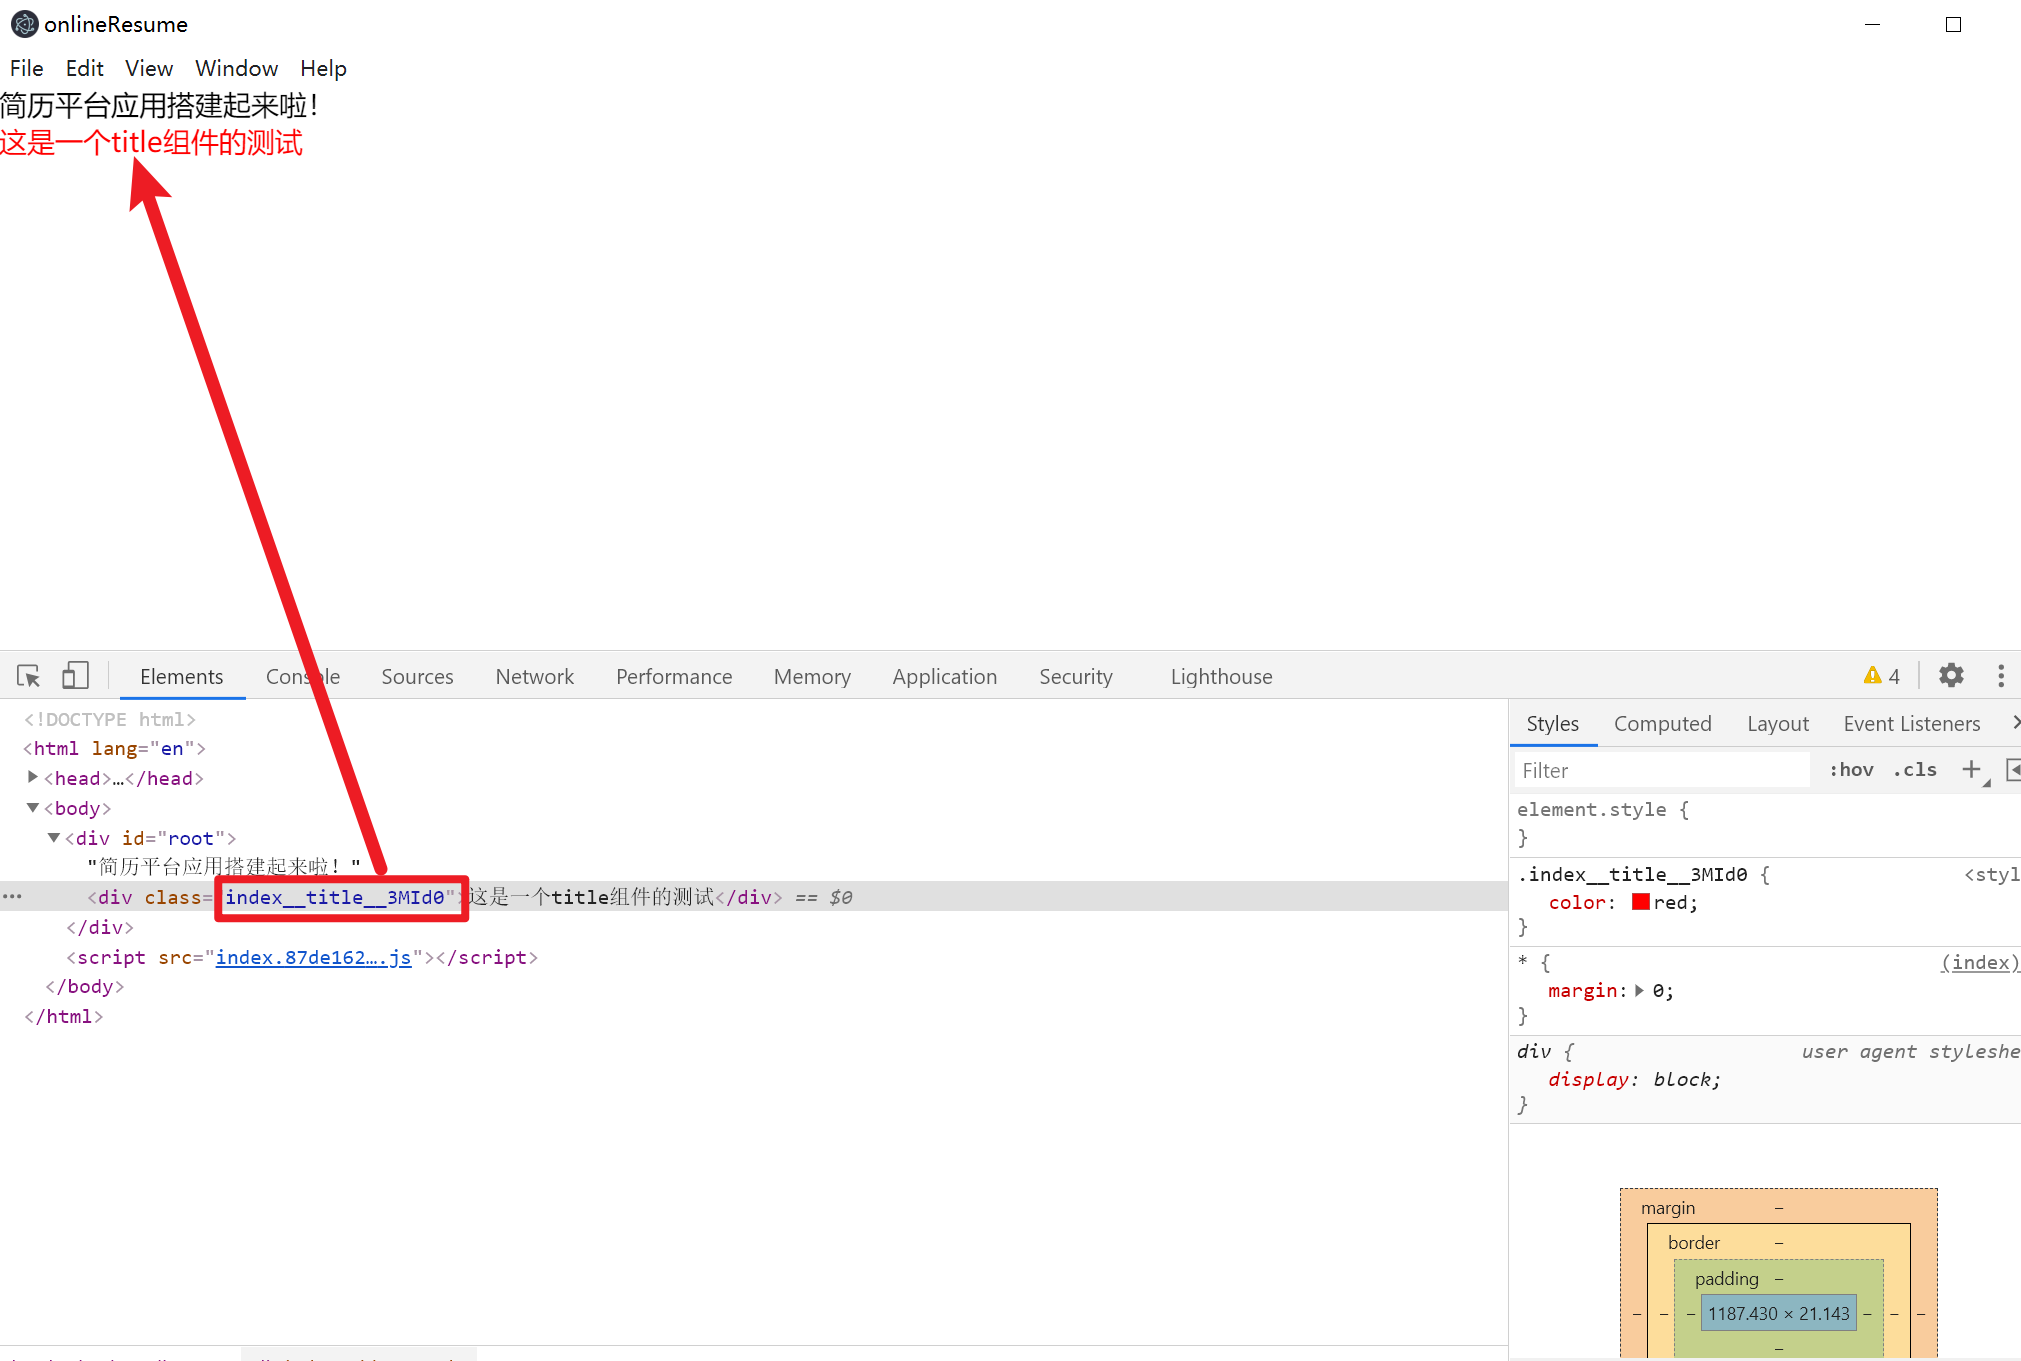
再次运行,看看效果,我们可以看到,类名的格式为 [组件名]_[当前类名]_[哈希值取5位] ,从而形成独一无二的 class 名字,不会与其他选择器重名。至此我们完成了样式相关的配置处理。

# 4. styleName
在 React 中 CSS Modules 会使得我们写代码都要通过 styles 的形式
import React from 'react'; | |
import lessStyle from './index/less'; | |
function Title() { | |
return <div className={lessStyle.box} />; | |
} | |
export default Title; |
特别繁琐,所以通过插件 react-css-modules 实现 styleName 的形式,但是每次都需要写成这样
import React from 'react'; | |
import CSSModules from 'react-css-modules'; | |
import lessStyle from './index.less'; | |
class Title extends React.Component { | |
render() { | |
return ( | |
<div styleName="box"> | |
<div styleName="cell">test</div> | |
</div> | |
); | |
} | |
} | |
export default CSSModules(Title, lessStyle); |
此外还有一个插件,babel-plugin-react-css-modules,这个插件更加好用
为了改造成这种形式,我们进行配置修改,我们先安装插件
// 👇 不安装会在使用 styleName 时 TS 报错 | |
npm install @types/react-css-modules@4.6.2 --save-dev | |
// 👇 让我们更好的使用 CSS Module | |
npm install babel-plugin-react-css-modules@5.2.6 --save-dev | |
npm install postcss-less@3.1.4 --save-dev |
然后在 babel.config.js 文件中添加一下配置
module.exports = { | |
plugins: [ | |
...// css-modules | |
[ | |
'babel-plugin-react-css-modules', | |
{ | |
exclude: 'node_modules', | |
webpackHotModuleReloading: true, | |
generateScopedName: '[name]__[local]__[hash:base64:5]', | |
autoResolveMultipleImports: true, | |
filetypes: { | |
'.less': { syntax: 'postcss-less' }, | |
}, | |
}, | |
], | |
], | |
}; |
最后再看看组件的代码是怎样的
import React from 'react'; | |
import './index.less'; | |
interface IProps { | |
/** | |
* @description 标题 | |
*/ | |
text: string; | |
/** | |
* @description 样式 | |
*/ | |
styles?: React.CSSProperties; | |
} | |
function Title({ text, styles }: IProps) { | |
return ( | |
<div style={styles} styleName="title"> | |
{text} | |
</div> | |
); | |
} | |
export default Title; |
# 6. 文件类型报错
当我们在代码中引入一张照片时,打包会发生错误
官方提供了一种专门处理此类型的方案: file-loader ,我们安装一下这个 loader
npm install file-loader --save-dev
修改一下 webpack.base.js
module.exports = { | |
// ... | |
module: { | |
rules: [ | |
{ | |
test: /\.(jpg|png|jpeg|gif)$/, | |
use: [ | |
{ | |
loader: 'file-loader', | |
options: { | |
name: '[name]_[hash].[ext]', | |
outputPath: 'images/', | |
}, | |
}, | |
], | |
}, | |
], | |
}, | |
plugins: [new CleanWebpackPlugin()], | |
}; |
# 5. 文件部分类型 TS 报红
我们此刻引入一张图片,TS 会报错,说找不到模块
这时候我们只需要在 app/renderer 目录下,新增一个 global.d.ts 文件即可
// global.d.ts | |
declare module '*.jpg' { | |
const jpg: string; | |
export default jpg; | |
} |
⚠️ 请注意:如果你在根目录下新增 global.d.ts 文件,请确保你的 tsconfig.json 中
include字段是能匹配到 global.d.ts 文件
关于 global.d.ts 可配置的东西可太多了,一般来说,我们 window.pdk 肯定会被 ts 报红,说 window 上并无此属性,这时候我们又不想改成 (window as any).pdk ,那么我们可以扩展 Window 的类型
// 这里用于扩充 window 对象上的值 | |
declare interface Window { | |
pdk: string; | |
} |